100% test methods for industry applications
Exact description of causes
Typical gearwheel errors include
- Damage
- Unfinished surfaces
- Ripples and “ghost orders”
- Contact pattern deviations
- Pitch errors
- Eccentricities
- Deviations from circularity.
The Discom analysis methods distinguish between these and other defects and provide a clear description of the causes.
Measurements
The Discom system for gearwheel testing reliably detects production errors – in both single-flank and double-flank testing:
Double-flank testing
In double-flank testing, a master gearwheel is used to scan the entire tooth surface of the test specimen. Double-flank testing with Discom analysis is a fast and reliable method for detecting damage and surface errors. It can be combined with geometry checking.
Single-flank testing
Single-flank testing can be performed with a master gearwheel or with regular gearwheel pairs. The TAC sensor reliably detects surface ripples, radial deviations, contact surface errors and damage at rotational speeds up to 10,000 rpm.
Transmission error / Dynamic Backlash
Two high-resolution angular encoders on the axles of the test specimen and the master gearwheel are used for rotation angle error analysis. Based on the angular deviation from the theoretical drive ratio, the Discom system calculates the characteristic geometric values of the test specimen. Rotation angle error analysis can be combined with single-flank testing and the TAC sensor.
Production analysis
WebPal Production Statistics from Discom helps users to track trends, allowing them to detect problems that will occur at an early stage, before they become a true problem.
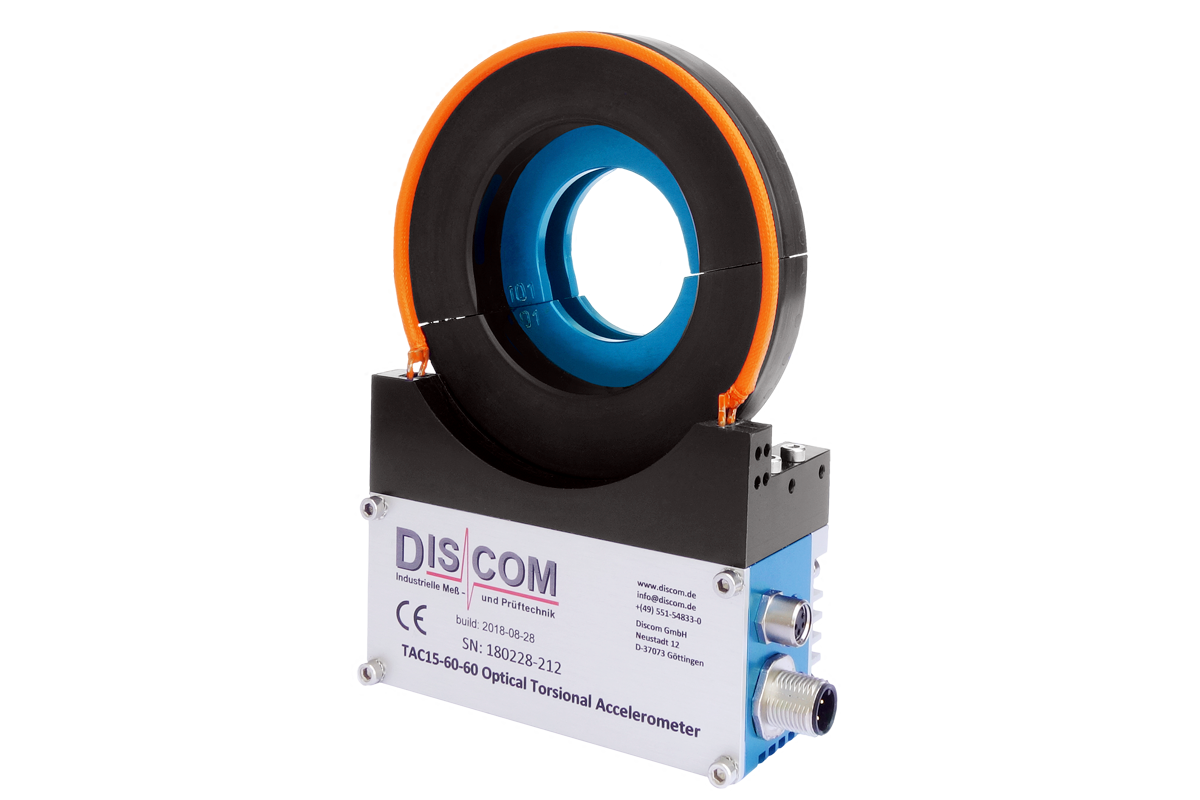
Torsional accerelation sensor
The torsional acceleration sensor TAC is the ideal solution for measurements in a rotating system directly in the gearwheel test bench. It is positioned directly on the axle of one of the gearwheels and measures torsional vibrations. The TAC acquires vibrations in the gearwheels that indicate damage, surface errors or geometry errors in the teeth. The sensor reliably determines rotation angle errors.
The sensor uses two accelerometers at opposite 180° positions. This cancels the effect of external vibrations and acceleration (gravity). The gearwheels are tested for axial distance and under load. The objective is to determine all tooth errors that produce noises if possible.
The sensor uses an inductive power supply and infrared diodes for data contactless transmission.
 Your benefits
Exact description of the causes of the manufacturing defects
- Comprehensive quality testing
- Exact determination of production errors
- Reliable: Testing in accordance with DIN 3960
- Sensor is integrated directly into the gearwheel test bench
- TasAlyser analysis software with numerous calculation capabilities
- Comprehensive possibilities for analyzing measured data
 Your advantages
Increase the competitiveness
- Higher manufacturing quality
- Reduce rejects
- Avoid complaints
- Optimize the process costs of gearwheel production
- Increase competitiveness on the market


